Appearance
Unisex Premium Sweatshirt | Cotton Heritage M2480
This Unisex Premium Sweatshirt has a classic crew neck, flattering unisex fit, and soft 100% cotton exterior. You can customize the front of the pullover as well sleeves and labels. So get busy designing, and add this item to your store!
- 100% cotton face
- 65% cotton, 35% polyester
- Charcoal Heather is 55% cotton, 45% polyester
- Fabric weight: 8.5 oz/y² (288.2 g/m²)
- Tightly knit 3-end fleece
- Side-seamed construction
- Self-fabric patch on the back
- Double-needle stitched rib collar, cuffs, and hem
- Tear-away label
- Blank product sourced from Pakistan
DANGER
Measurements are provided by suppliers.
Product measurements may vary by up to 2" (5 cm).
Measure yourself
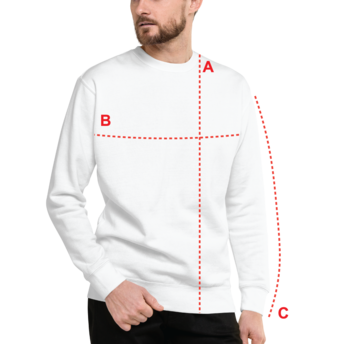
A Length
Place the end of a measuring tape beside the collar at the top of the garment (high point shoulder). Pull the tape to the bottom of the item.
B Chest
Measure yourself around the fullest part of your chest. Keep the measuring tape horizontal.
C Sleeve length
Place one end of the tape at the top of the set-in sleeve, then pull the tape down until you reach the hem of the sleeve.
Find your size (Inches)
| Size | Length | Chest | Sleeve length |
| S | 27 | 33 - 36 | 23 ½ |
| M | 28 | 37 - 40 | 24 |
| L | 29 | 41 - 43 | 24 |
| XL | 30 | 44 - 46 | 24 |
| 2XL | 31 | 47 - 49 | 24 |
| 3XL | 32 | 50 - 52 | 24 |
Find your size (Centimeter)
| Size | Length | Chest | Sleeve length |
| S | 68.6 | 83.8 - 91.4 | 59.7 |
| M | 71 | 94 - 101.6 | 61 |
| L | 73.7 | 104 - 109.2 | 61 |
| XL | 76.2 | 111.8 - 116.8 | 61 |
| 2XL | 78.7 | 119.4 - 124.5 | 61 |
| 3XL | 81.3 | 127 - 132 | 61 |
Product measurements
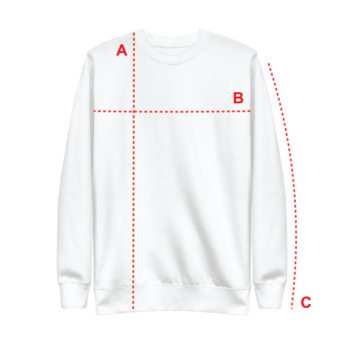
A Length
Place the end of a measuring tape beside the collar at the top of the garment (high point shoulder). Pull the tape to the bottom of the item.
B Chest
Measure yourself around the fullest part of your chest. Keep the measuring tape horizontal.
C Sleeve length
Place one end of the tape at the top of the set-in sleeve, then pull the tape down until you reach the hem of the sleeve.
Find your size (Inches)
| Size Label | Length | Width | Sleeve length |
| S | 27 | 20 | 23 ½ |
| M | 28 | 21 | 24 |
| L | 29 | 23 | 24 |
| XL | 30 | 25 | 24 |
| 2XL | 31 | 26 ½ | 24 |
| 3XL | 32 | 28 | 24 |
Find your size (Centimeter)
| Size Label | Length | Width | Sleeve length |
| S | 68.6 | 50.8 | 59.7 |
| M | 71 | 53.3 | 61 |
| L | 73.7 | 58.4 | 61 |
| XL | 76.2 | 63.5 | 61 |
| 2XL | 78.7 | 67.3 | 61 |
| 3XL | 81.3 | 71 | 61 |
WARNING
Product measurements may vary by up to 2" (5 cm).
DTG disclaimers
- We don't print white ink on white garments. Any designs containing white color will have areas with no print on them.
- Light ink elements on bright-colored garments might look tinted. This is most evident on Red, Maroon, and other similarly colored garments.
- There might be slight discrepancies in print placement.
Embroidery disclaimers
- If it's physically possible to digitize your graphic, we'll digitize it. If your design doesn't meet our guidelines, we can't guarantee desirable results.
- We use a run stitch for fine details in flat embroidery.
- The generated preview on the mockup is for visual reference only and will not always match the final result.
File guidelines
Printing (DTG)
| Placement | Sizes | Max print area | Recommended print file size | Print file template |
|---|---|---|---|---|
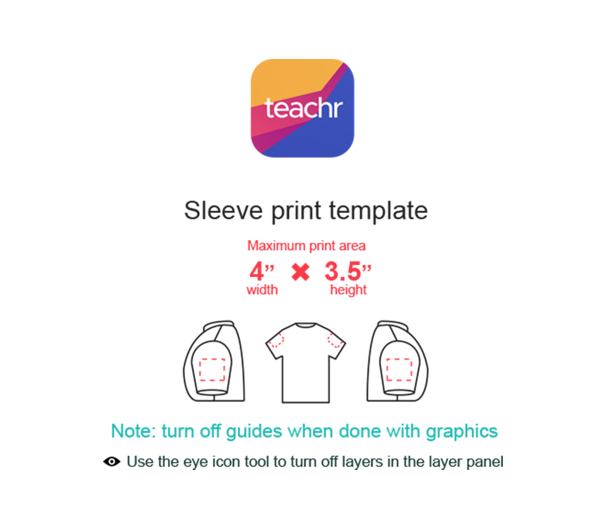
| Sleeve print | All sizes | 7.62 × 30.48 cm | 7.62 × 30.48 cm | Download |
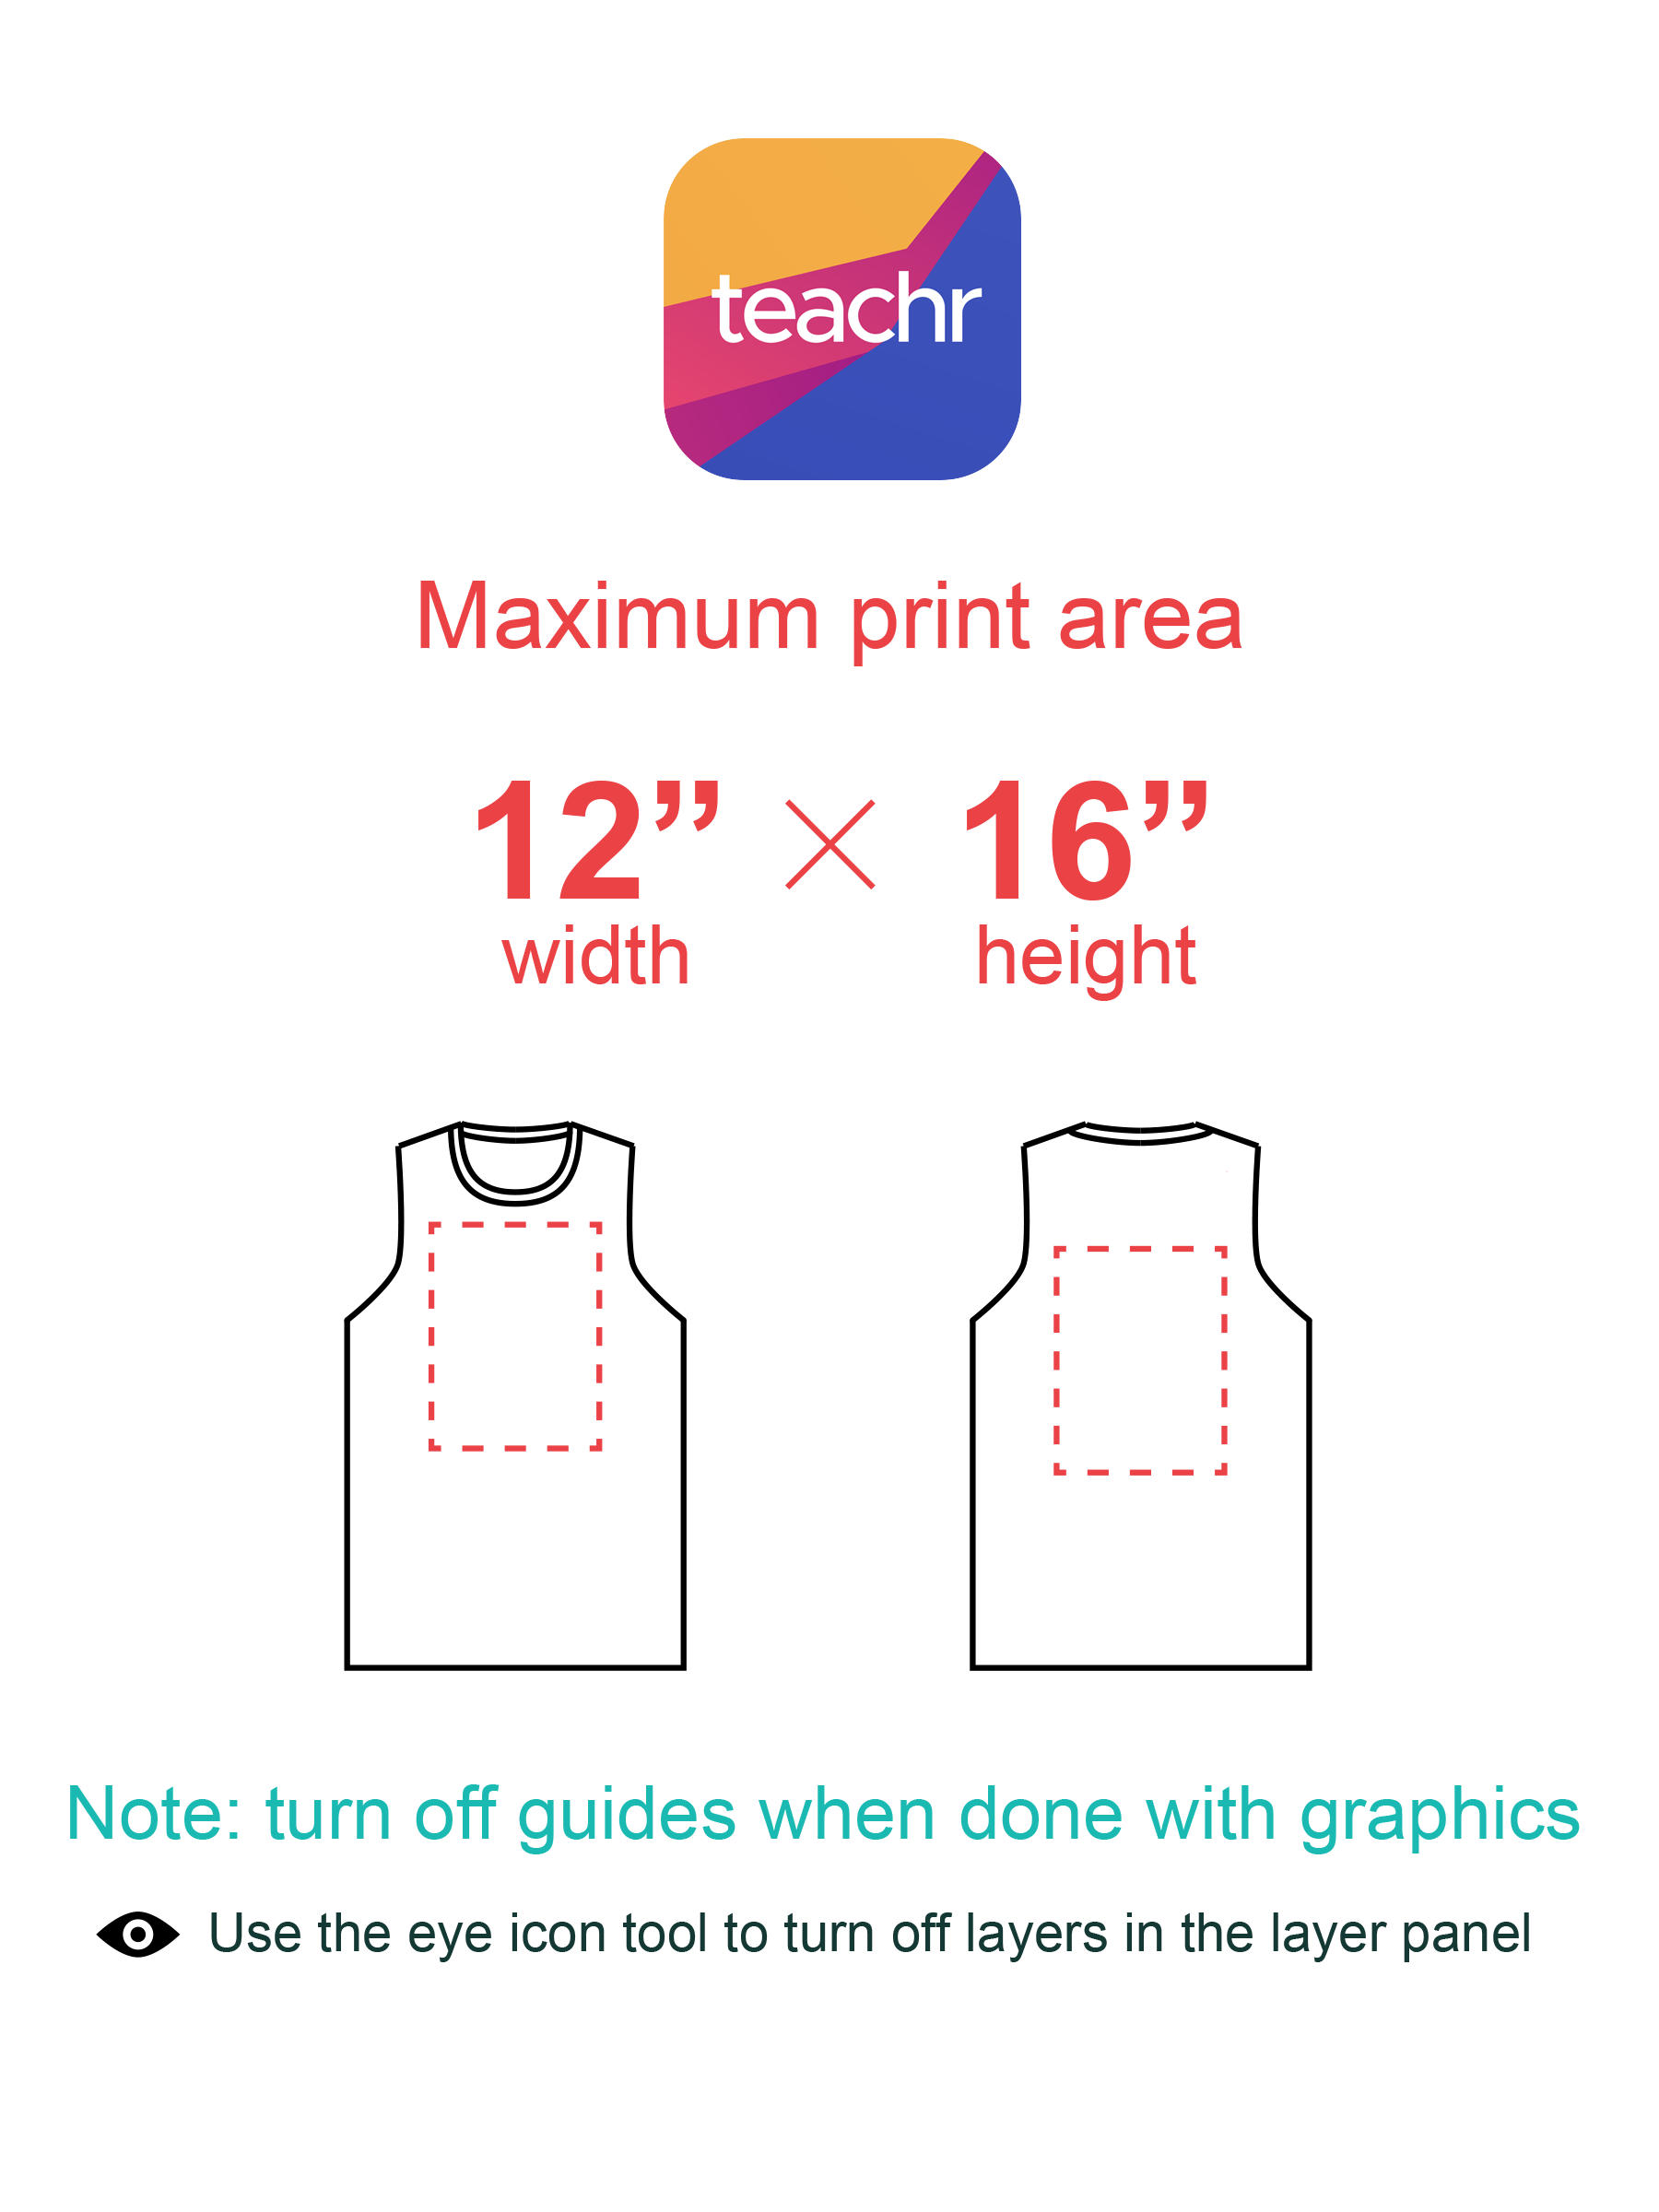
| Front & back print | All sizes | 30.48 × 40.64 cm | 30.48 × 40.64 cm | Download |
| Outside label | All sizes | 6.35 × 6.35 cm | 6.35 × 6.35 cm | Download |
WARNING
Must-follow guidelines
Submit files in PNG or JPEG format with at least 150 DPI We recommend using PNG for designs with a transparent background. For other designs, we advise preparing files in JPEG instead.
Create files in sRGB color profile To ensure your design looks the same when printed as it does on screen, make sure you create your print file in sRGB color profile.
Remove print file template guidelines If you use our downloadable templates, delete the guide layers before saving your files. If you don't delete them, they'll show up on the print.
TIP
Avoid semi-transparent designs Semi-transparent graphics (or elements with lowered opacity) don't translate well in DTG printing. We advise using solid colors, or simulating semi-transparency by halftoning (for more information, see our video tutorial).
Create designs with the necessary DPI Simply typing in a new resolution value into the file won't result in a higher resolution print. If your graphic's resolution is too low, the best solution is to recreate it.
Use transparency to your advantage Black ink will appear gray on black garments because of the white underbase used during printing. Leave these areas fully transparent when designing for black garments.
Avoid borders when designing sleeve prints We advise against using graphics with perfect borders for sleeve printing, since the print can warp slightly when the sleeve is being pulled off the pallet.
Embroidery
WARNING
Please use embroidery template for the embroidery layouts.
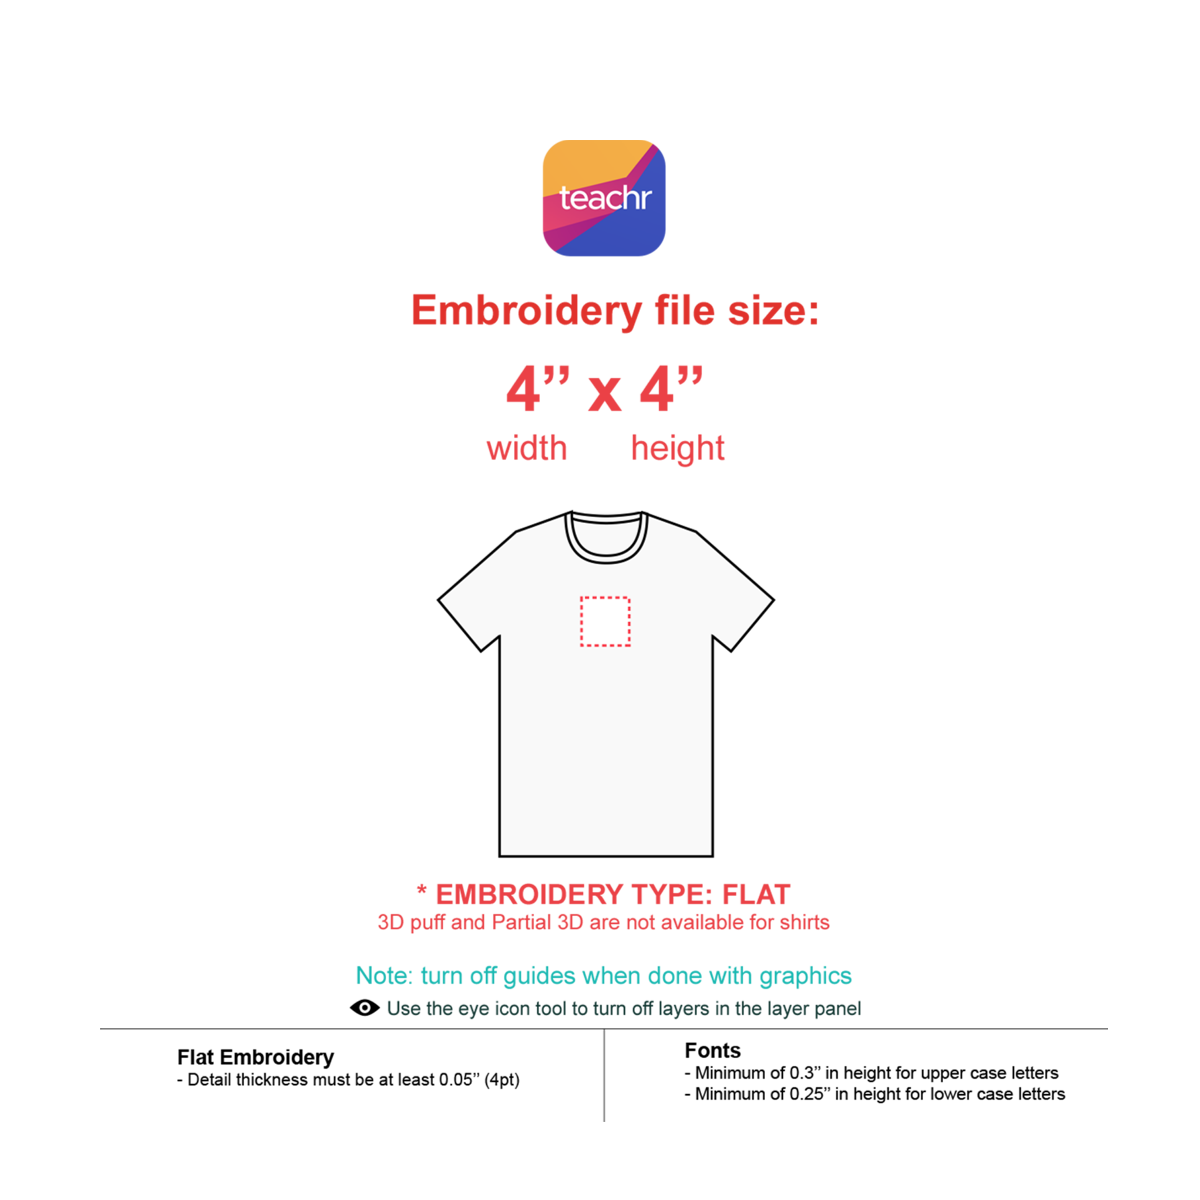
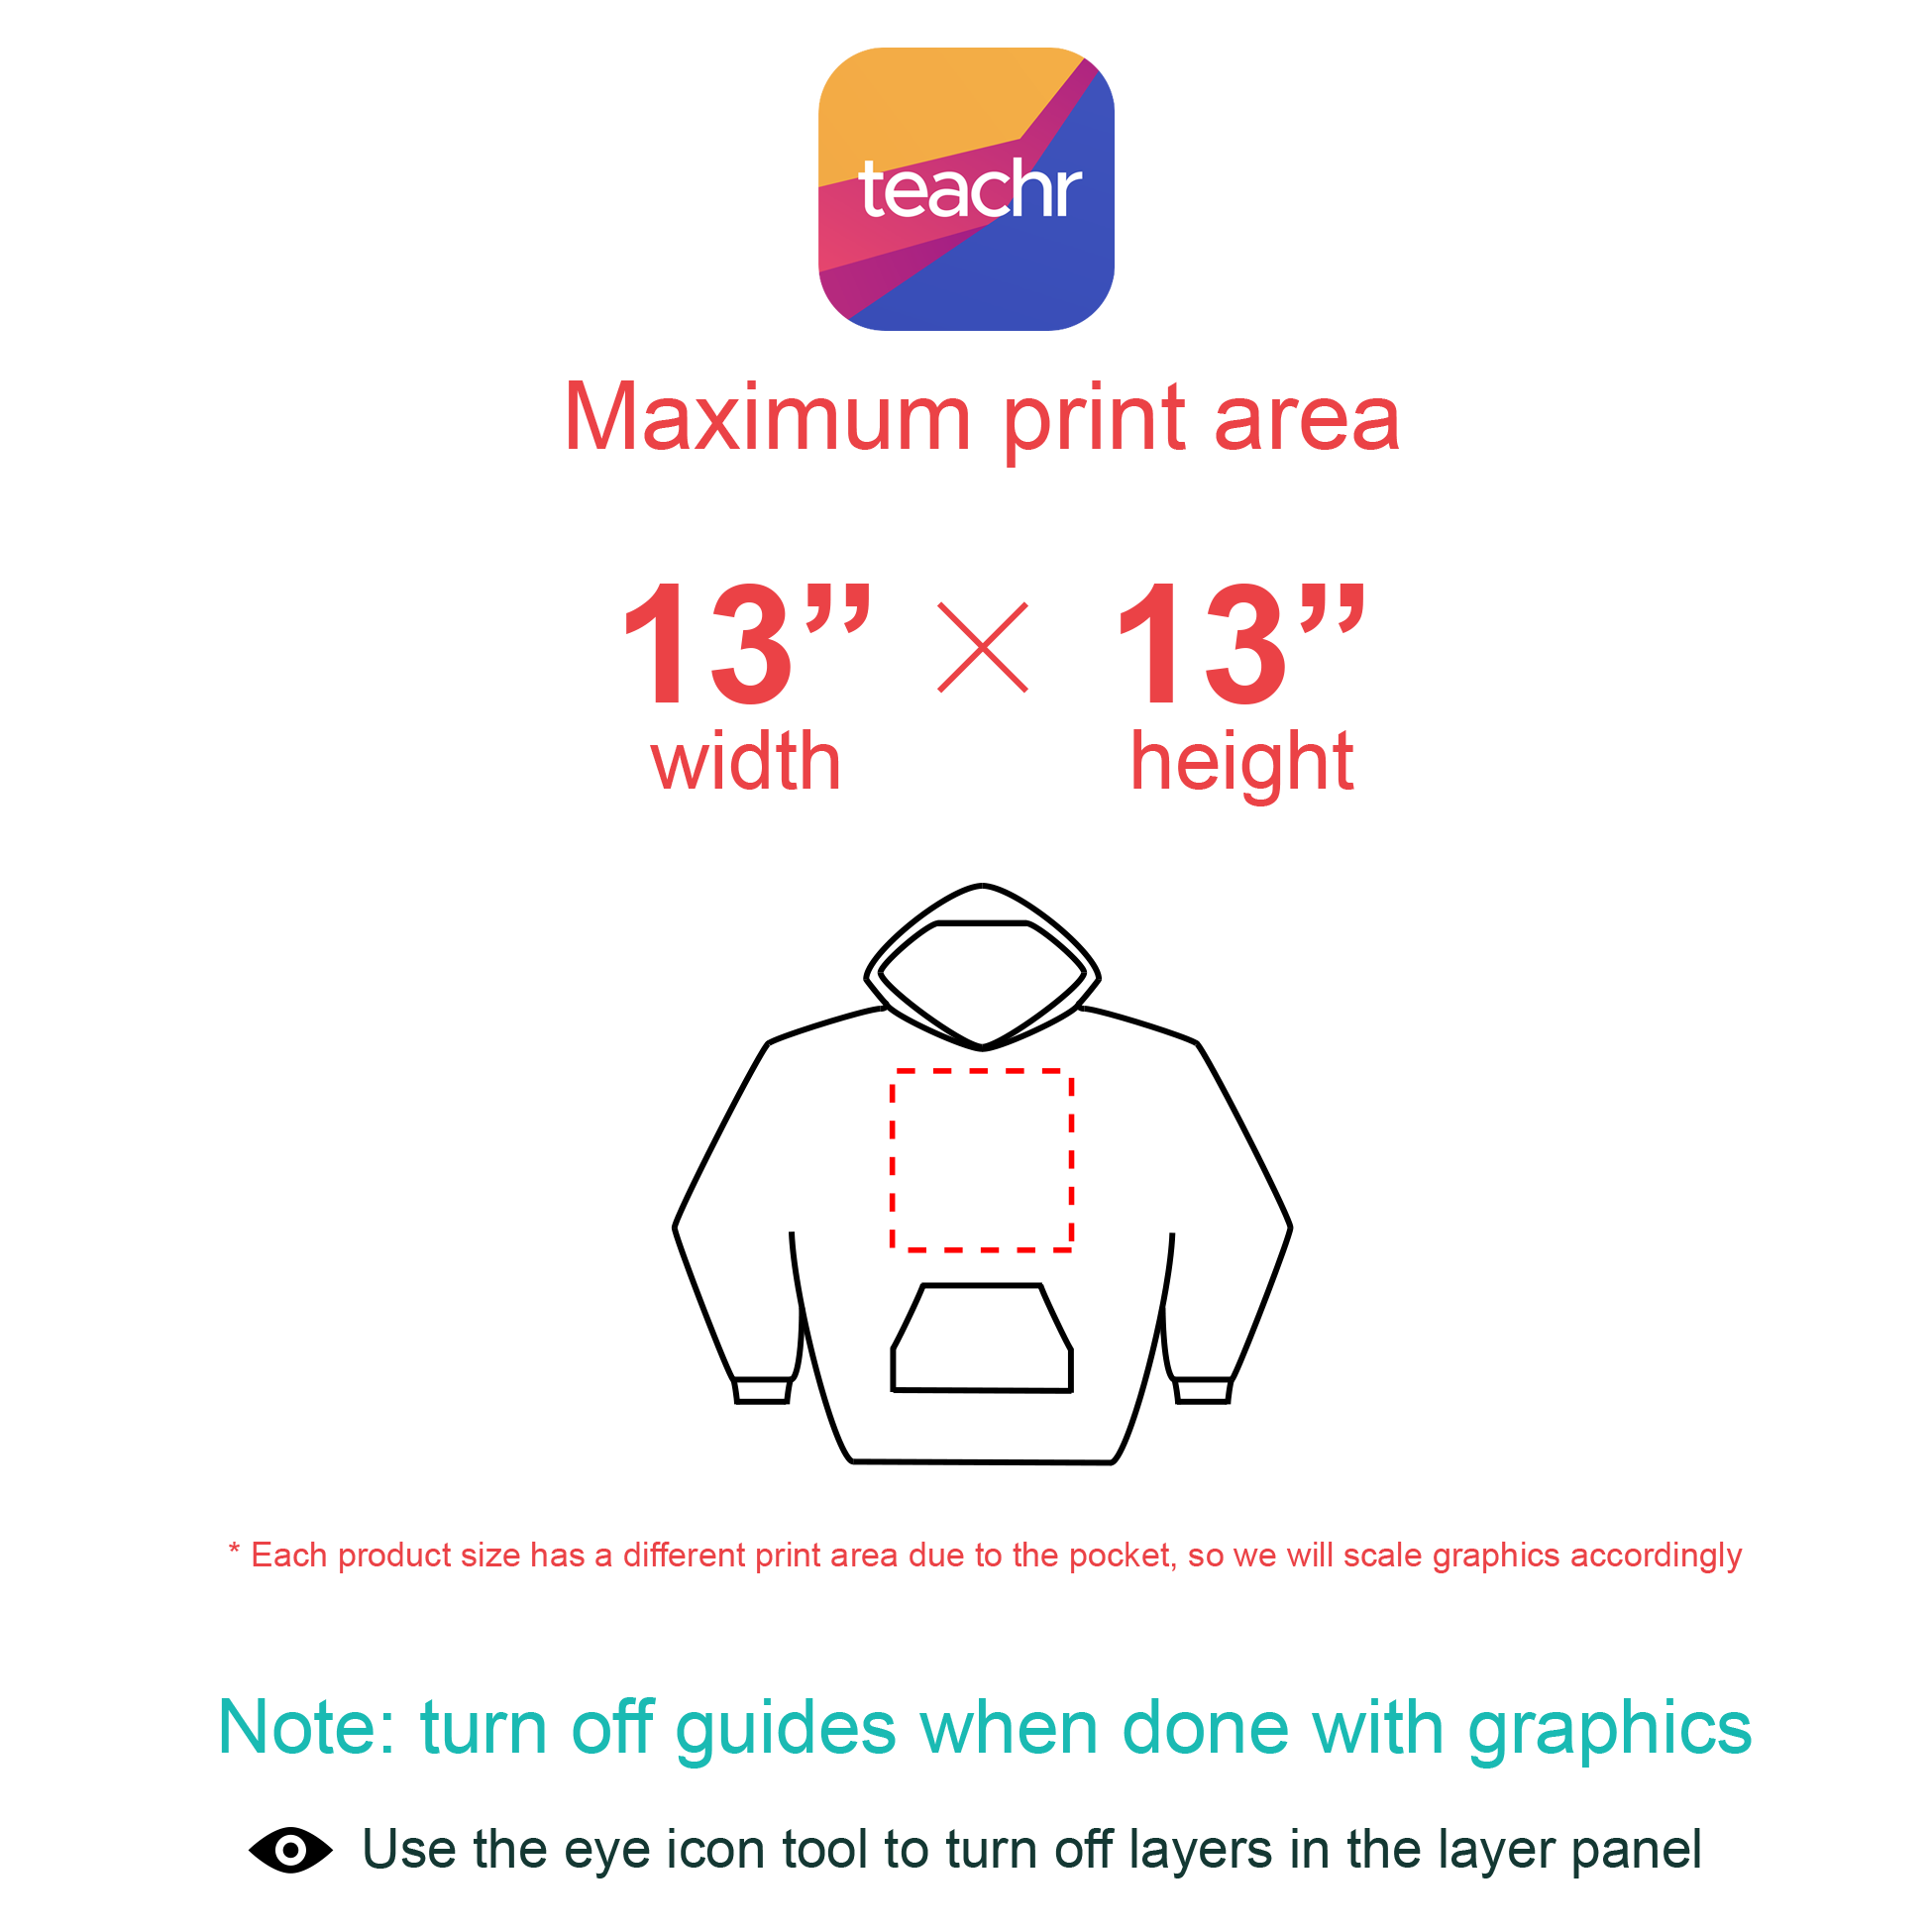
| Placement | Sizes | Max embroidery area | Embroidery file size | Embroidery file template |
|---|---|---|---|---|
| Left chest | All sizes | 10.16 × 10.16 cm | 10.16 × 10.16 cm | Download |
| Centered | All sizes | 10.16 × 10.16 cm | 10.16 × 10.16 cm | Download |
| Large Center | All sizes | 25.40 × 15.24 cm | 25.40 × 15.24 cm | Download |
Embroidery types
Flat embroidery
- Flat embroidery is a technique where stitches are embroidered flat on the shirt
- Minimum thickness for shapes: 0.05″ (1.3 mm)
- We use satin stitch for shapes between 0.05″ (1.3 mm) and 0.5″ (12.5 mm)
- We use tatami stitch for shapes thicker than 0.5″ (12.5 mm)
- Minimum height for lowercase letters: 0.25″ (6.4 mm)
- Minimum height for uppercase letters: 0.3″ (7.6 mm)
- Any text smaller than 0.25″ (6.4 mm) in height will be a run stitch
WARNING
Must-follow guidelines
Design true-to-size graphics The graphics you upload must be true to their size on the end product.
Use solid shapes and colors only Don't include photographic images, gradients, fade or blend effects. Elements like these cannot be embroidered.
Use transparent backgrounds Graphics should include transparent backgrounds. Elements outside the main design will be picked up and result in unwanted embroidery stitches on the end product.
Outline your fonts All fonts should be converted to outlines unless your graphic is in PNG format. That way you don't have to send us the font files.
Submit vector files in PDF format We highly recommend submitting your embroidery graphics as vector files (PDF). Raster graphics (PNG) can be used as well if the resolution of the graphic is at least 300 DPI.
Stay within the maximum stitch count If your graphic covers a very large part of the embroidery area, it may exceed the maximum limit of 15,000 stitches. In such case, your order will be put on hold.
Remove embroidery file template guidelines If you use our downloadable templates, delete the guide layers before saving your files. If you don't delete them, they'll be embroidered.
TIP
Order samples The best way to make sure your embroidery design looks the way you want is to order a sample of your work. We also recommend ordering an embroidery sample to learn about our techniques and stitch types.
Remember the side and back design option You can embroider a small design (e.g. your brand logo) on the back or either side of the hat. The design will be embroidered in flat embroidery.
Follow our embroidery guidelines Check out this page for the most common embroidery problems and tips on creating the perfect embroidery file.
Create embroidery-unique designs Embroidery is not printing, so most graphics that work on other products won't be suitable for embroidery.
Keep it simple Clean designs with bold lines and text work best for embroidery. If your design is too complex (e.g. contains gradients or intricate details), your order will be put on hold.