Appearance
Panorama
You can upload a 360° photo as a panorama which users can explore.
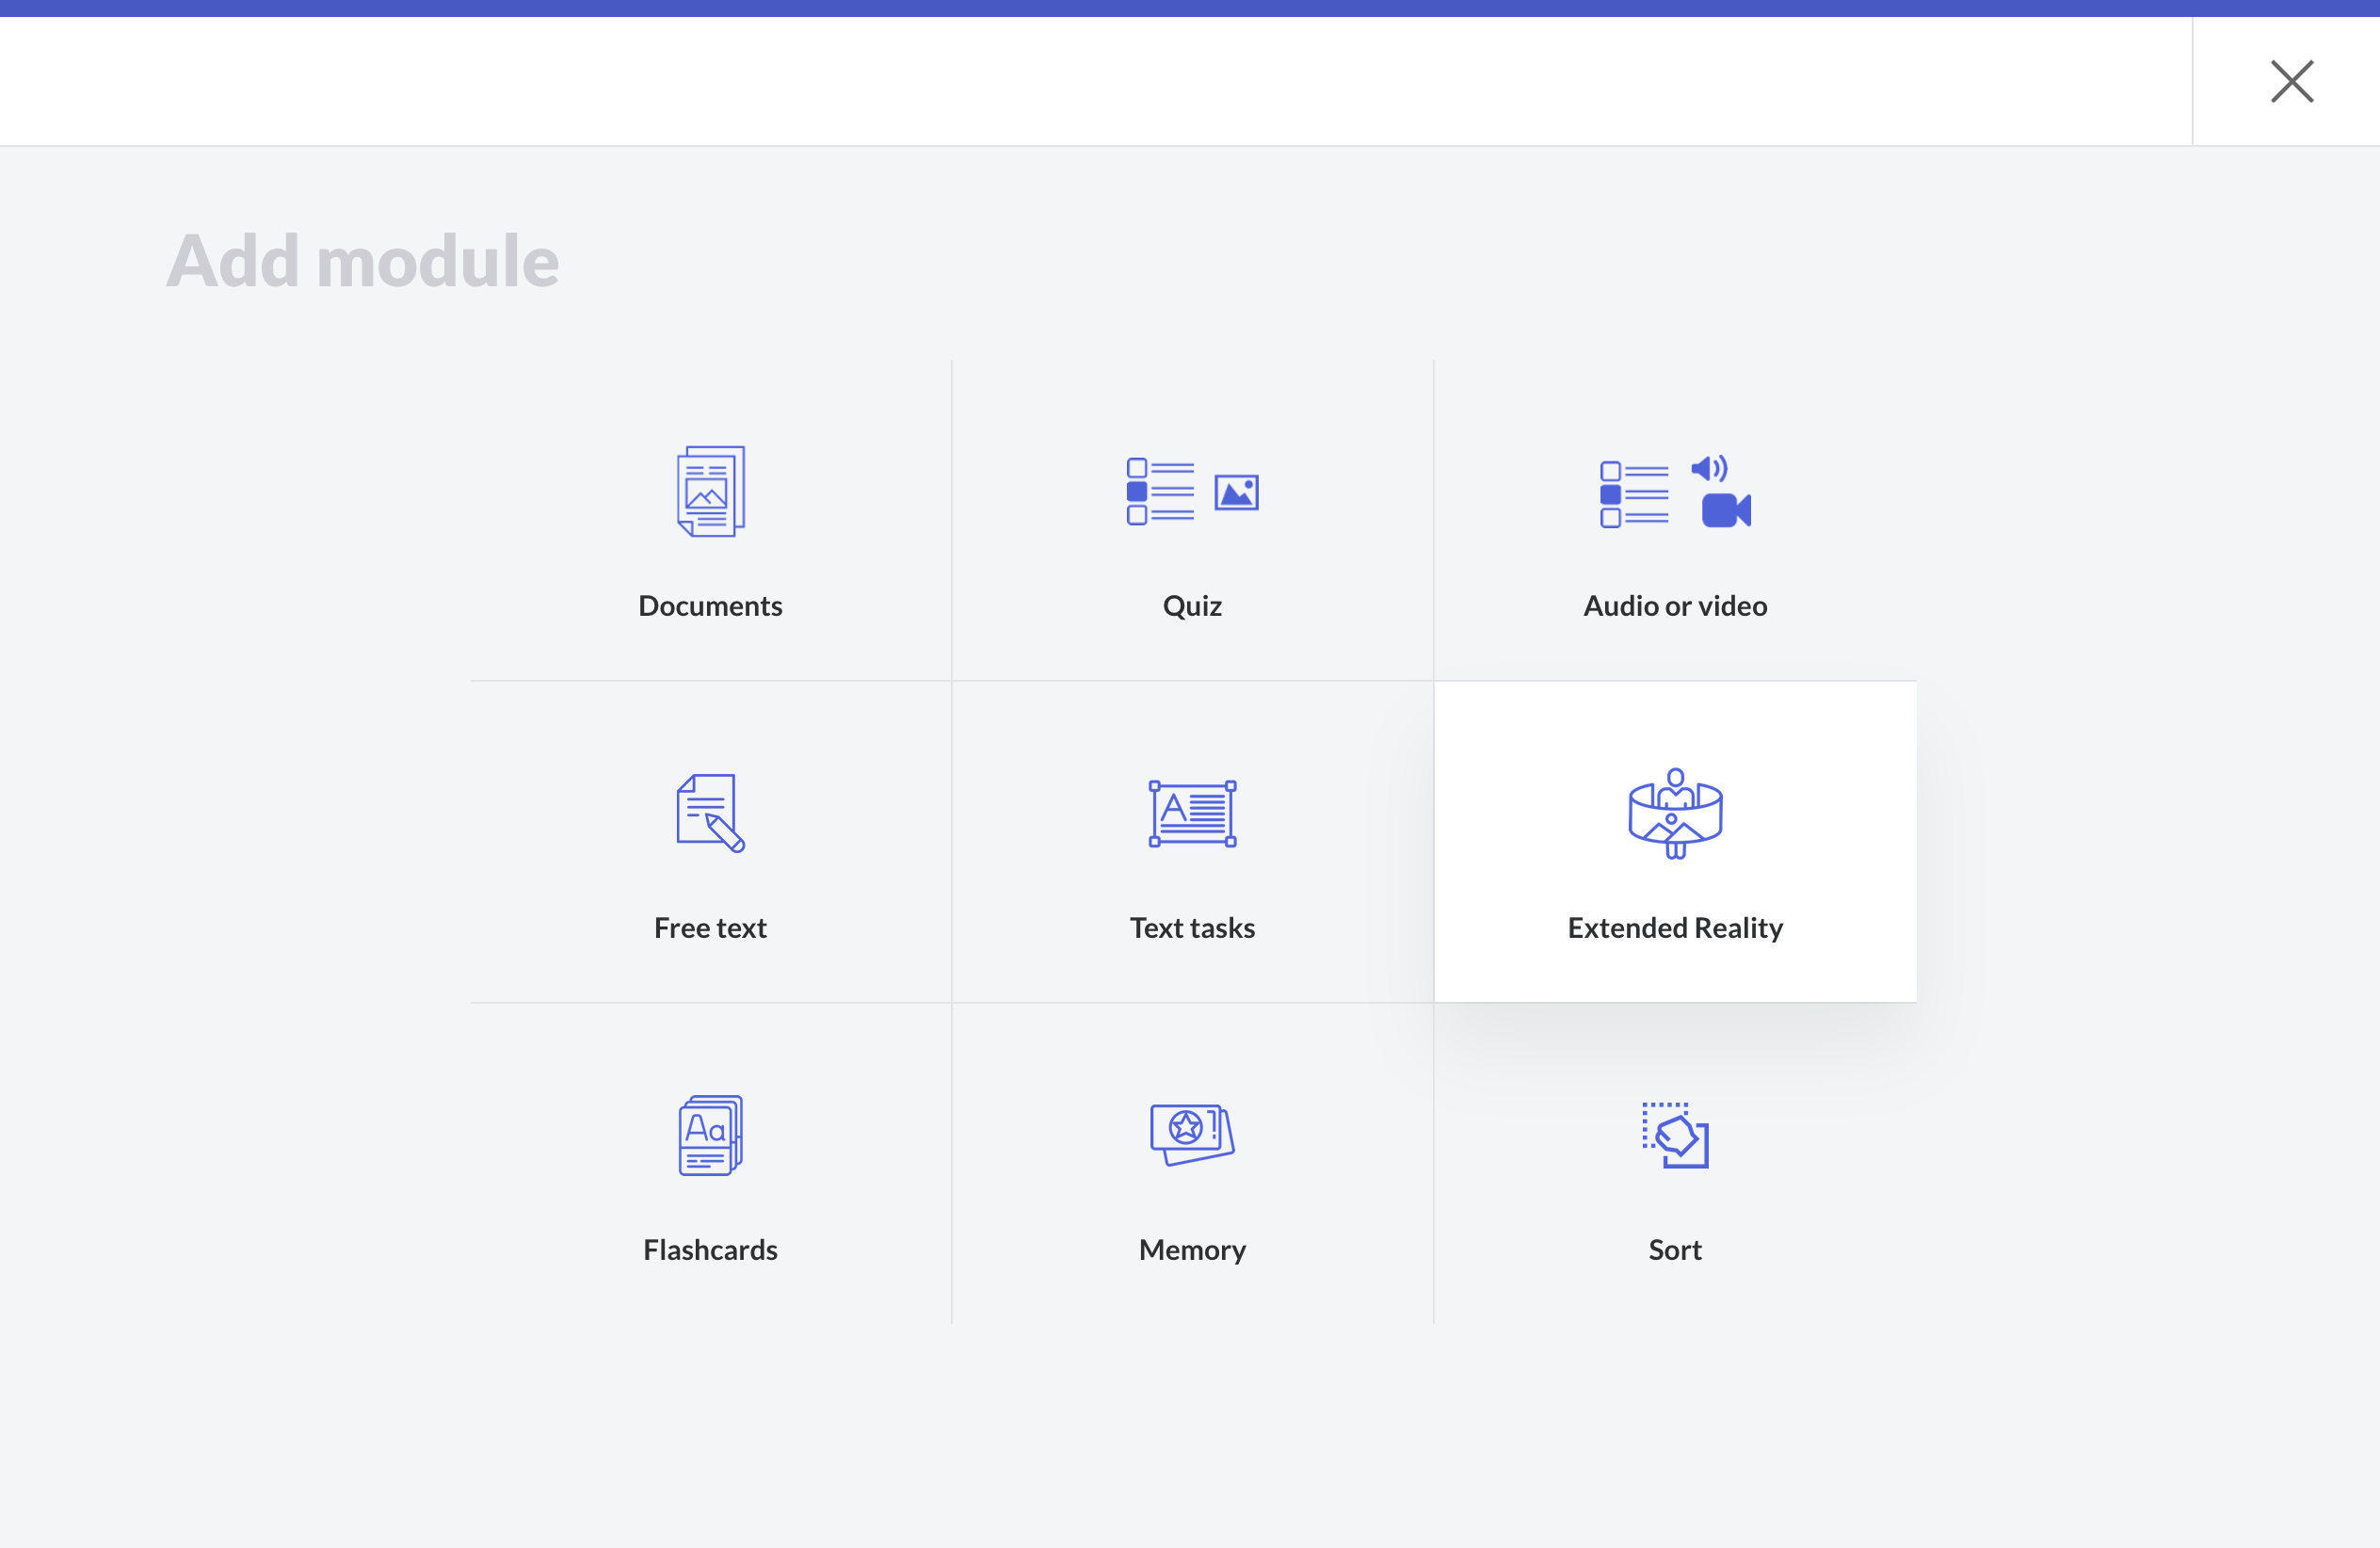
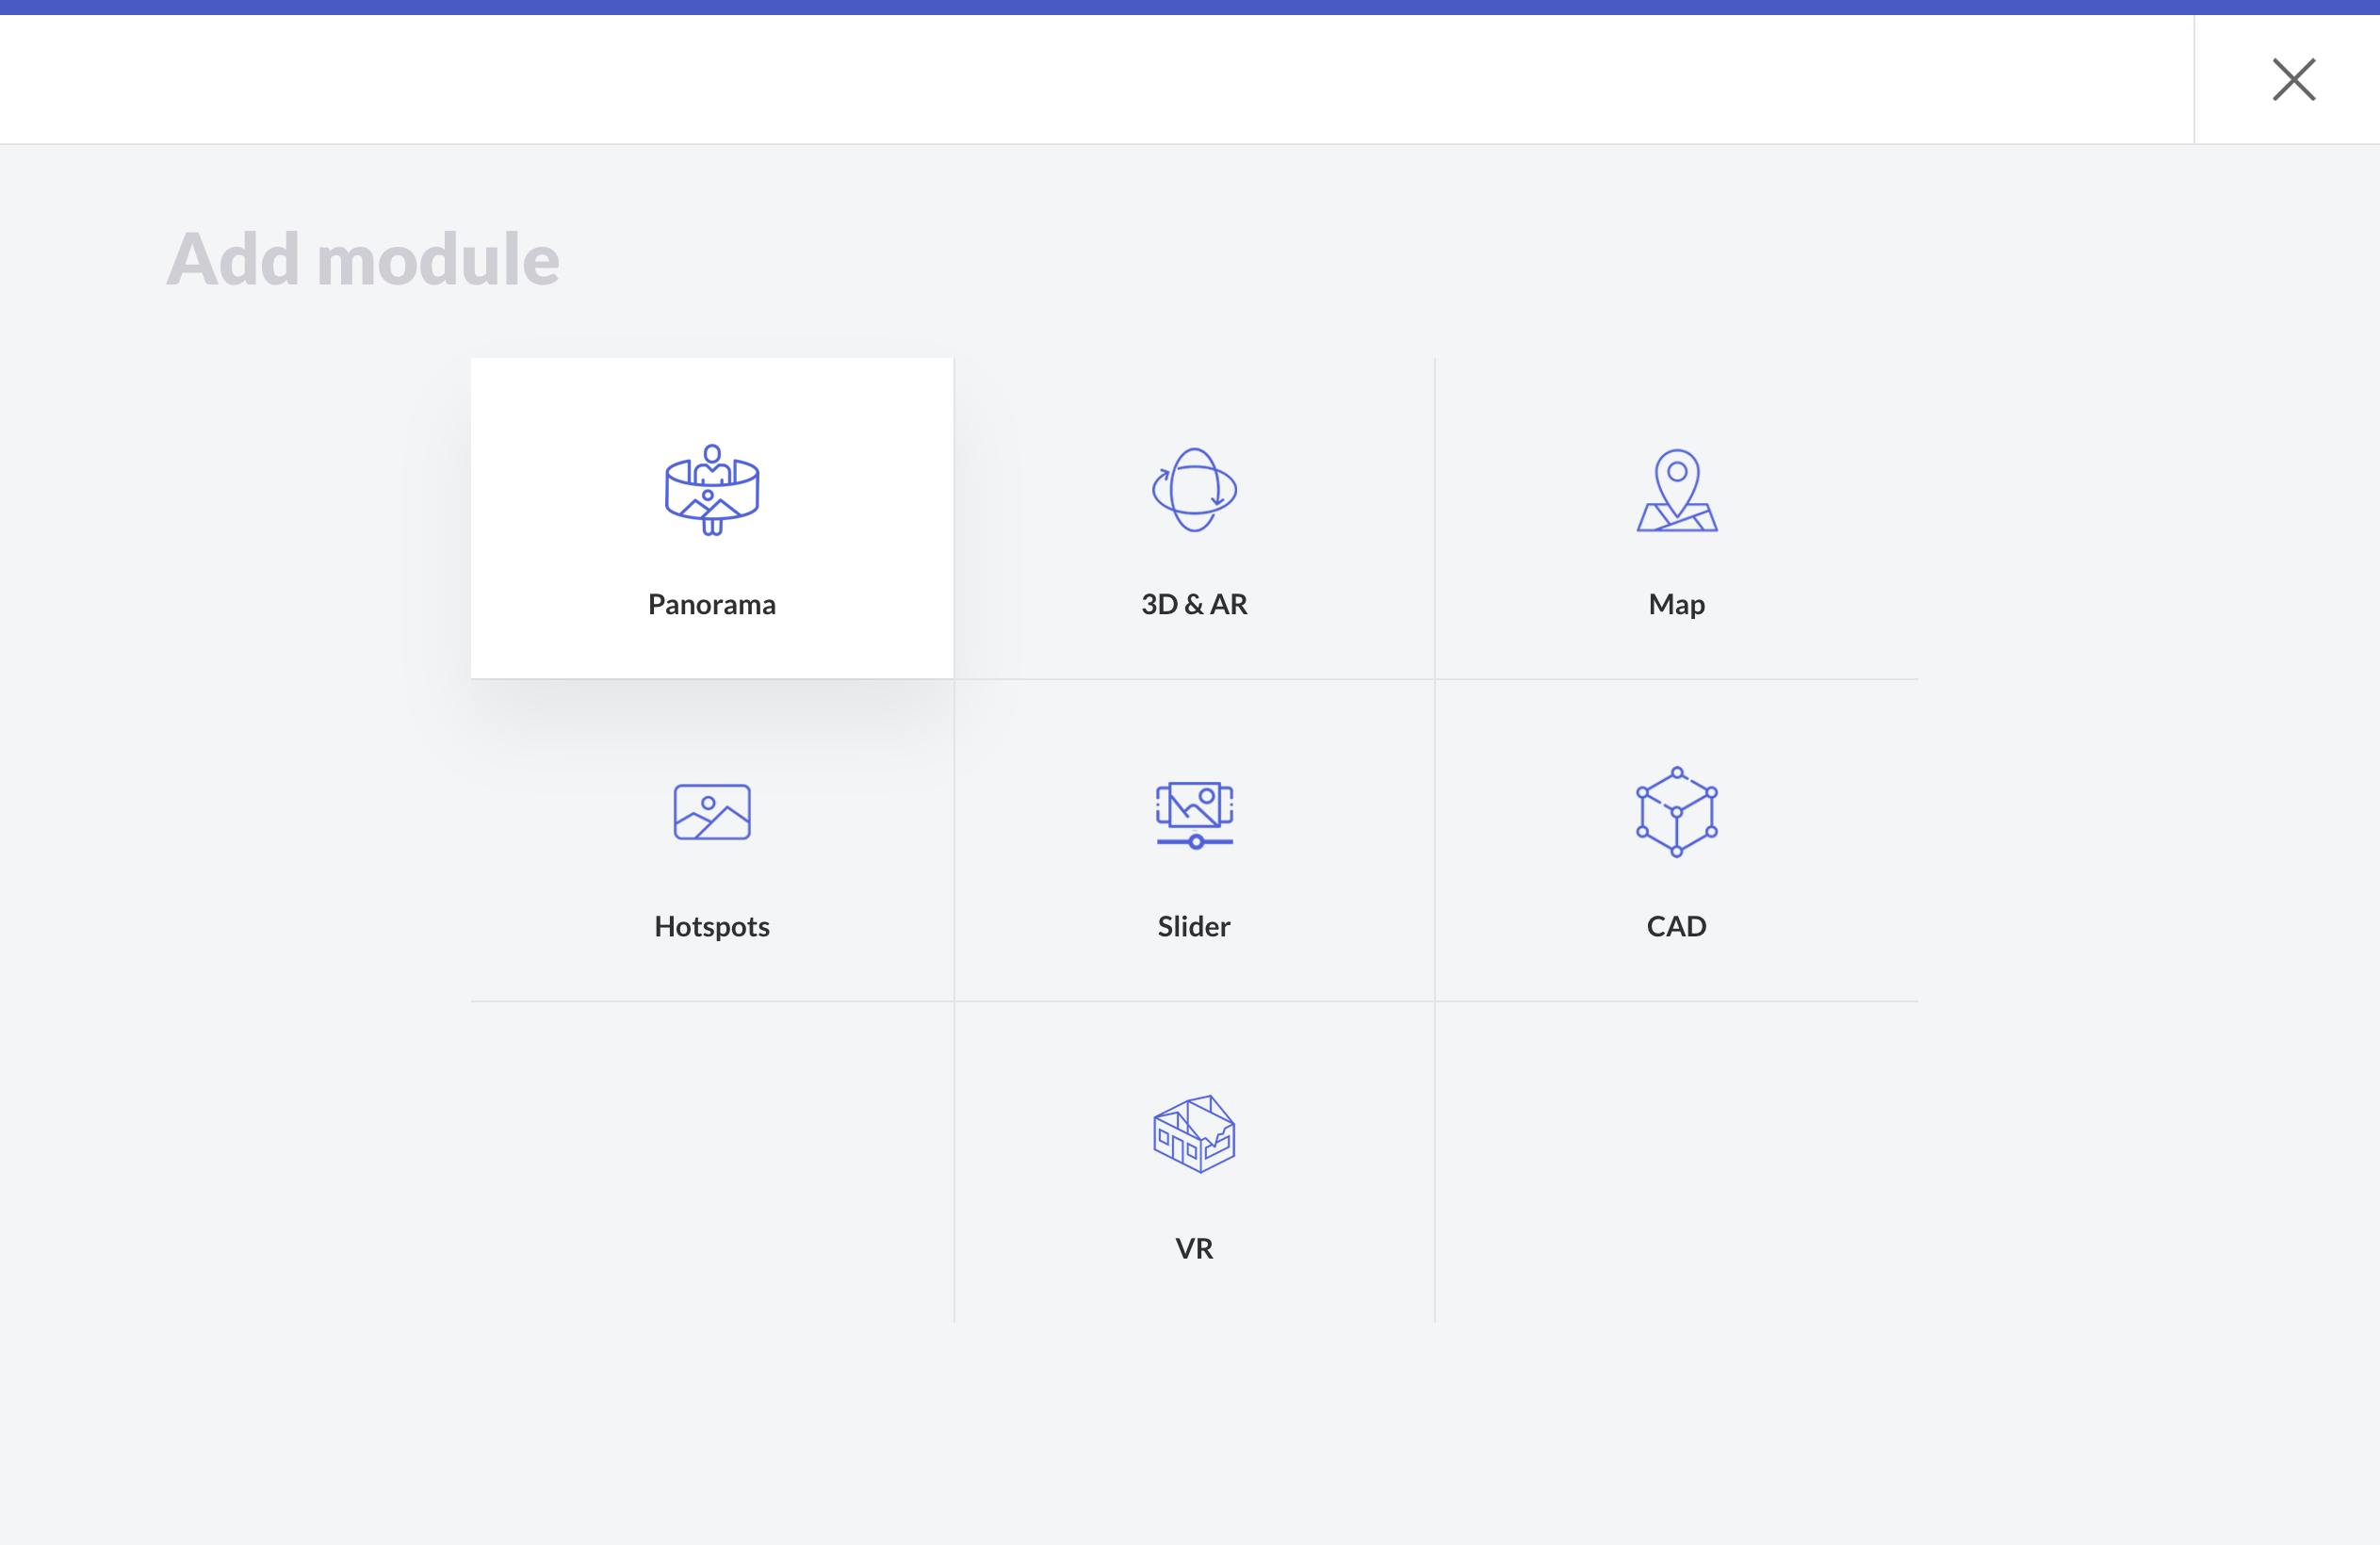
Go to your course ➝ your Section ➝ add a new building block ➝ (All modules) ➝ Extended Reality ➝ Panorama
There are plenty ways to create 360° images. For example creating a 360° Panorama on your smartphone is very easy with Google Street View - Create or import 360° photos .
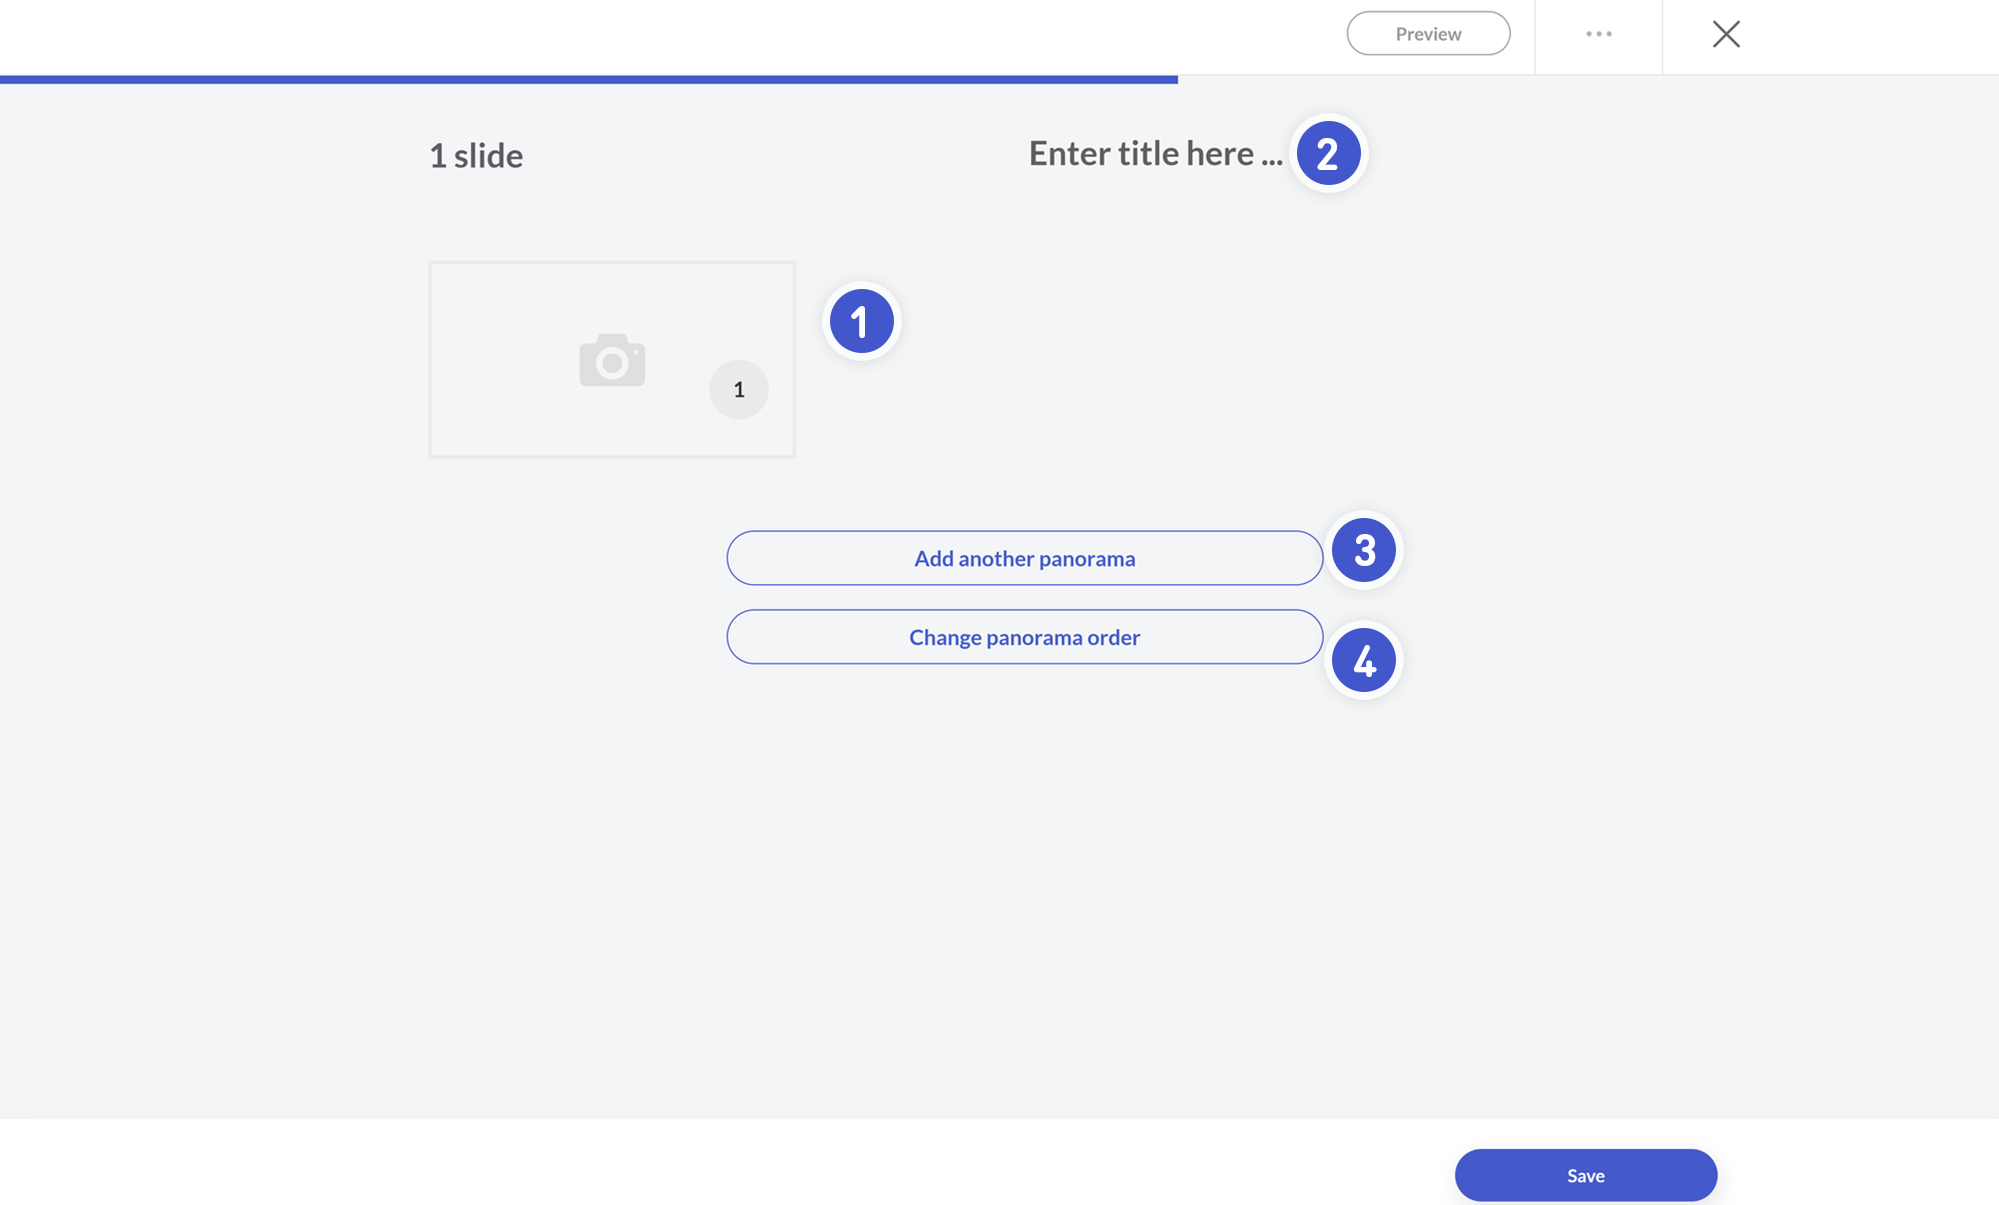
To import a created panorama photo in teachr do this:
- Hover over the area to reveal:
- A. Delete the uploaded image.
- B. Edit a scene to add a new image (by clicking on the pencil icon).
- Enter in here a title of your Panorama.
- Click Add another panorama if you want to upload multiple scenes. You can then link them together by simply creating a hotspot in one image to link to another scene. Users can then "walk" through your 360° scenes.
- You can change also here the sequence of the scenes.
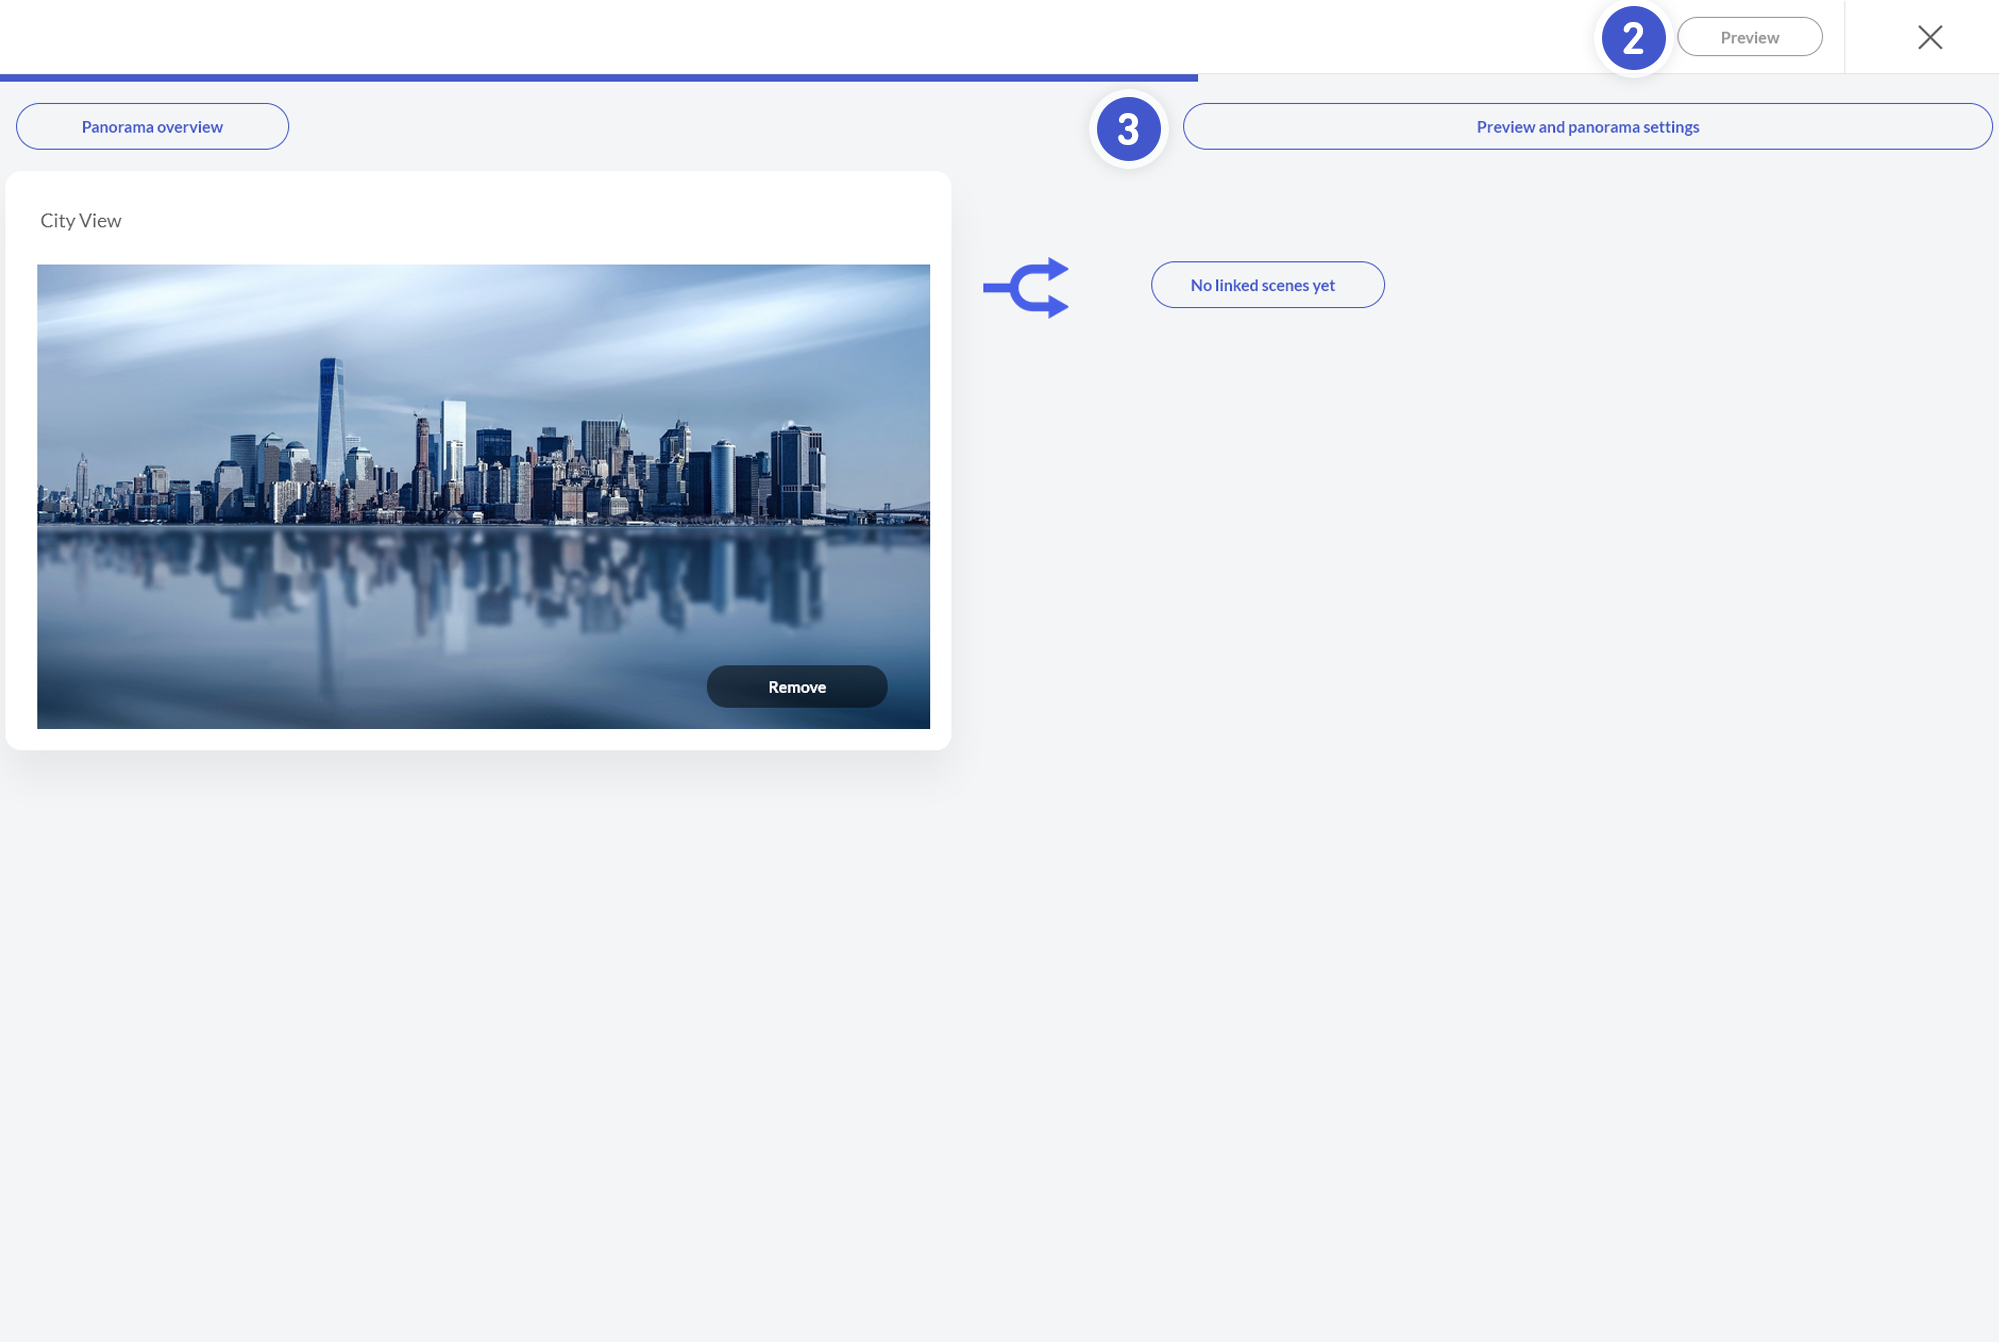
- In the edit view of the panorama scene, upload your image first.
- If you want to preview the full scene from a participants view click here.
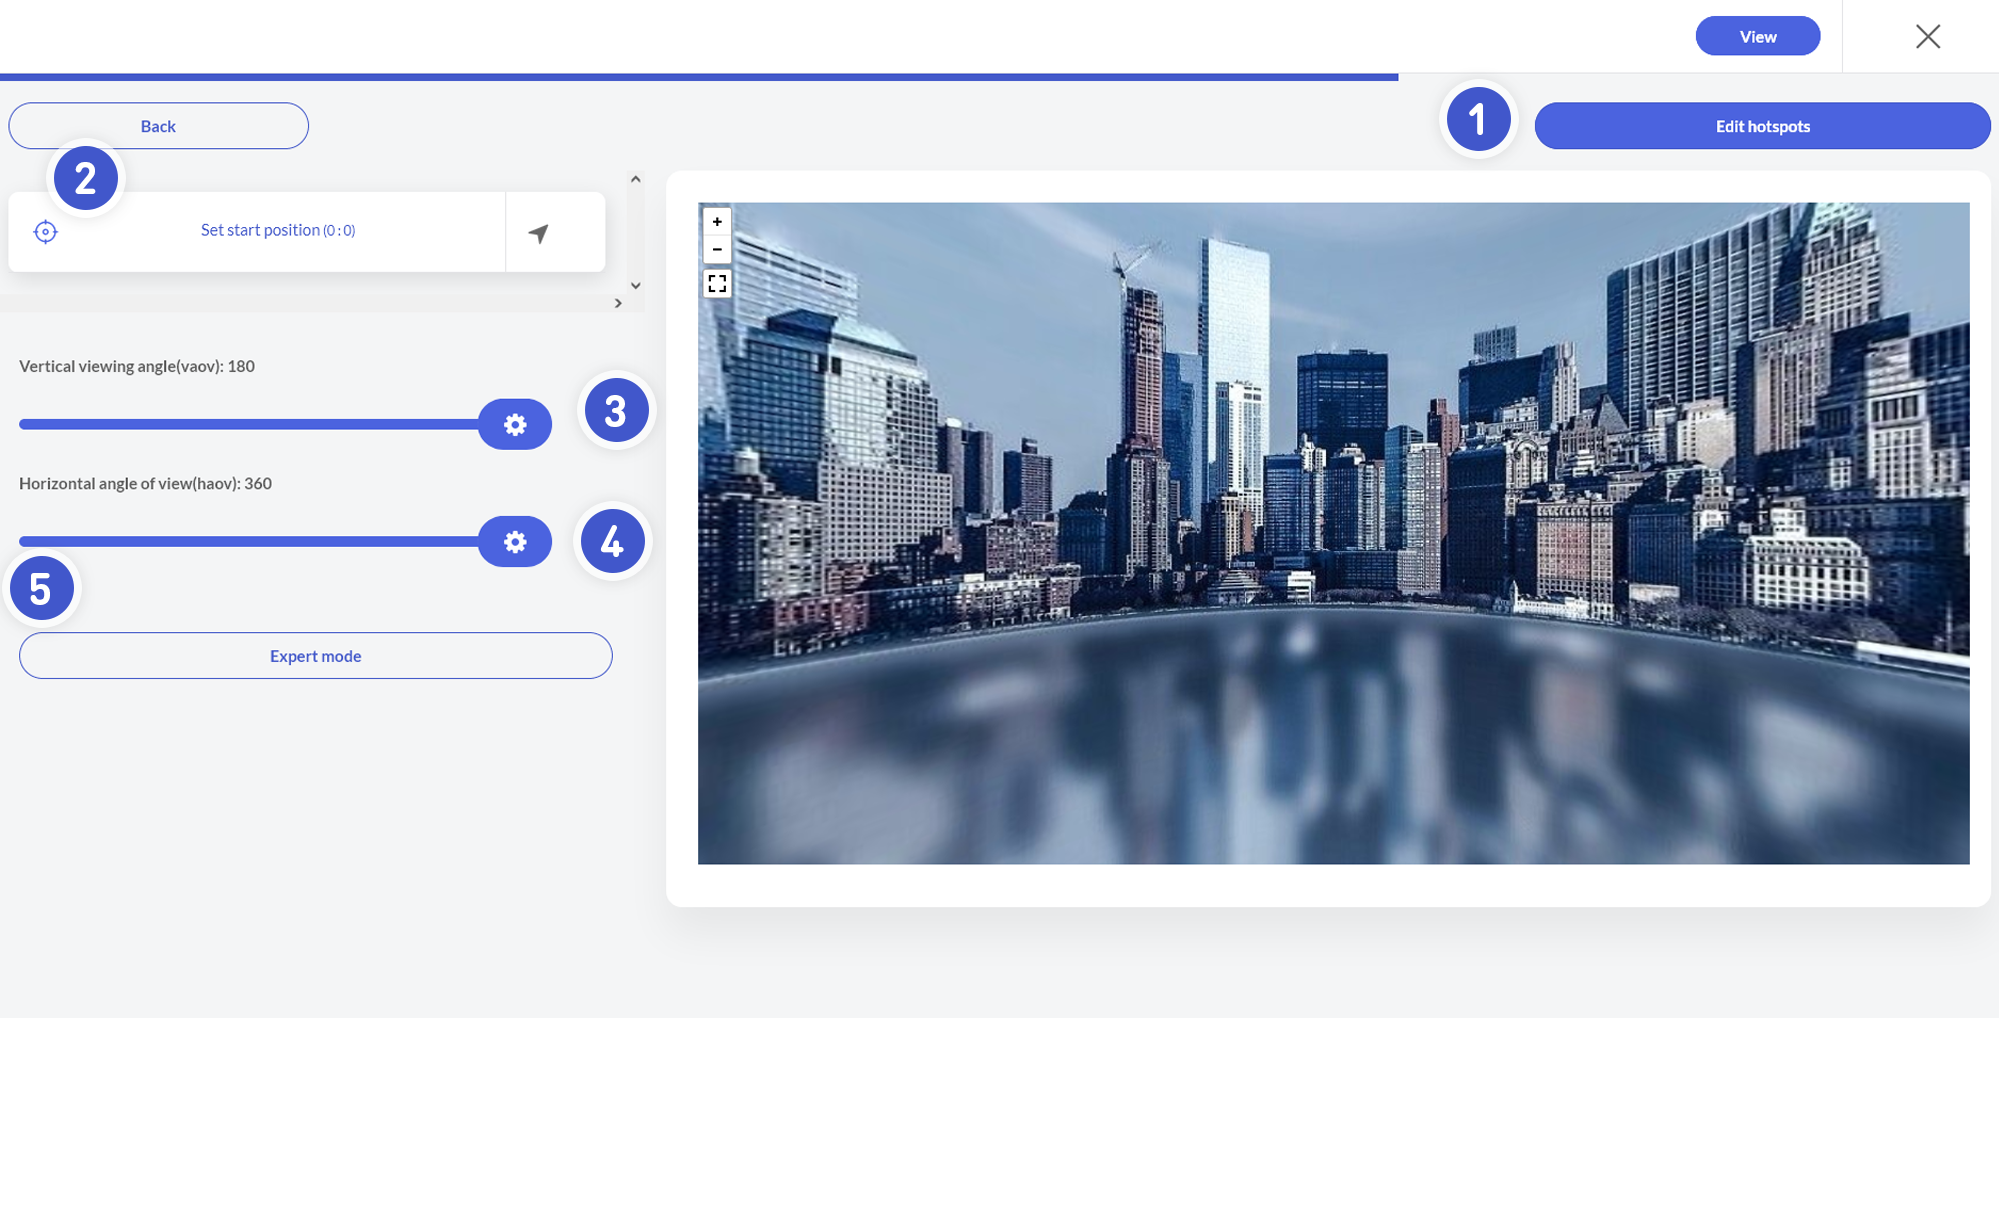
- If you want to edit the scene and make some adjustments like viewport, hotspots and sphere settings, you can do that here.
- In this view, you can insert hotspots into the image, e.g. to describe a specific element in the image.
- Set a starting point for the view by clicking Set starting position.
- Adjust the view with this slider for the vertical viewing angle.
- Adjust the view for the horizontal viewing angle with this slider.
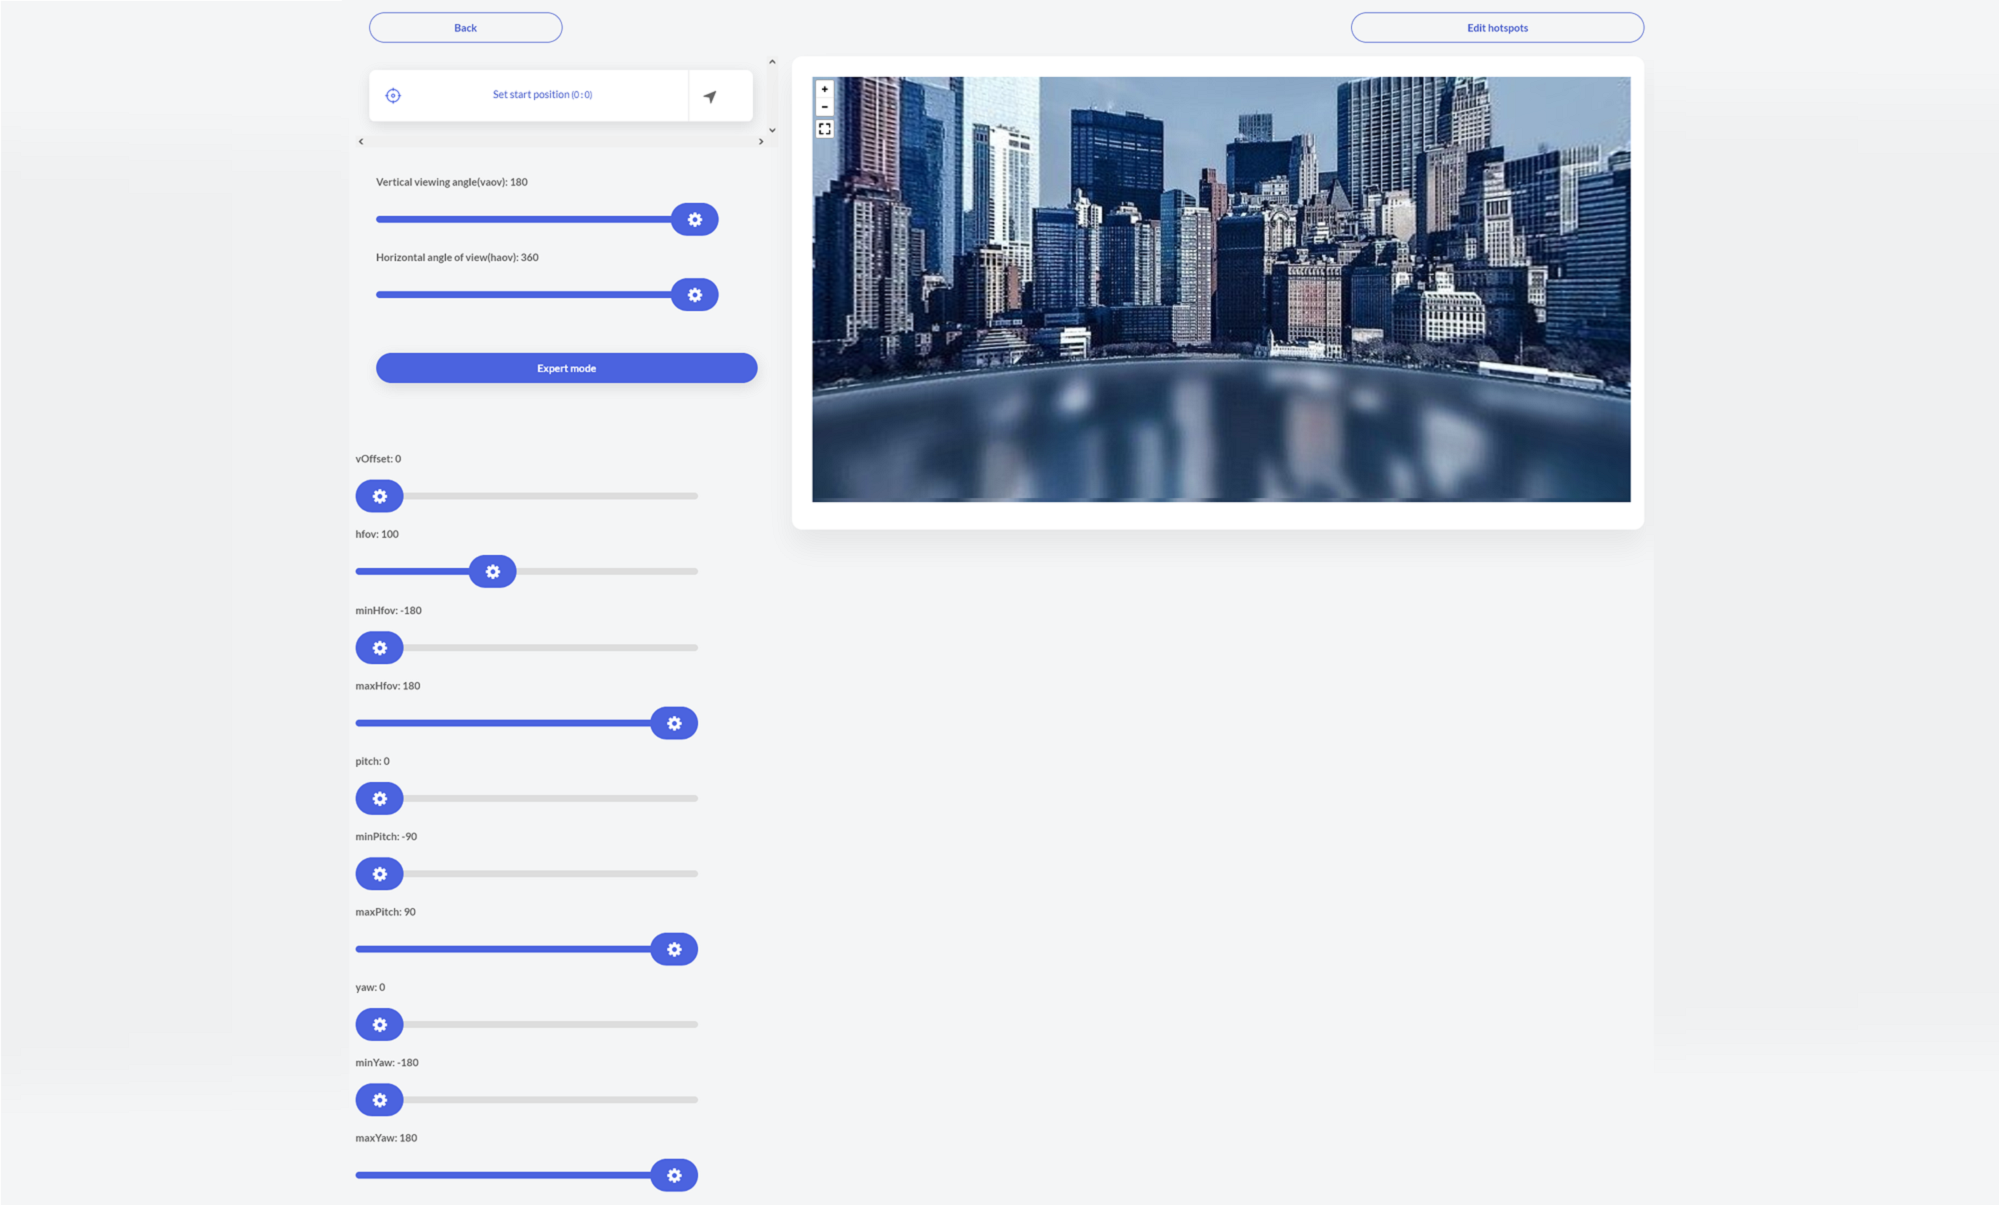
- You can also make further enhancements in the expert options.
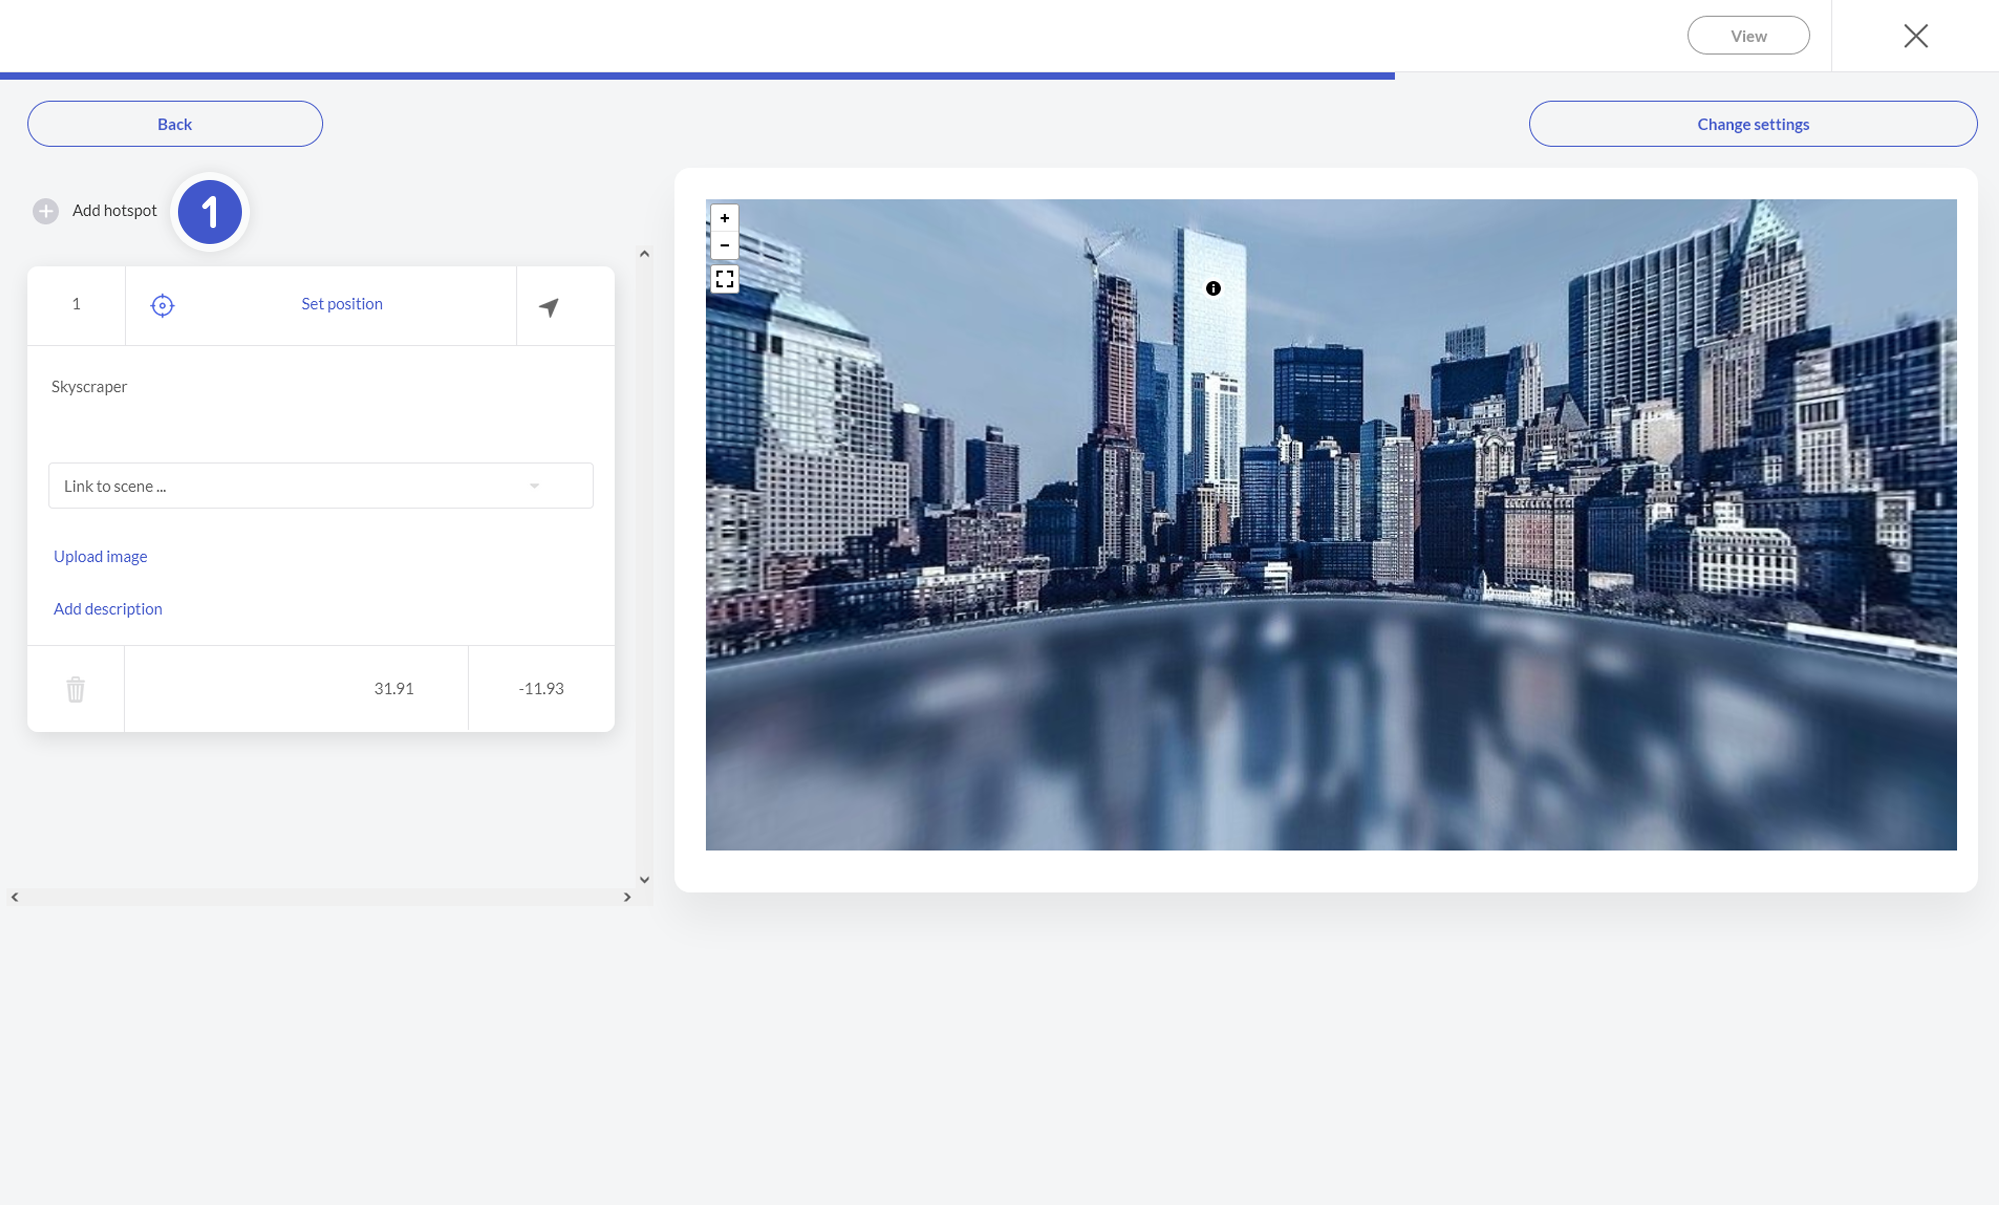
Then edit your hotspots as you wish. Insert texts or enlarged images to explain a specific part in your panorama.
Clicking on 1. Add hotspots will add a new hotspot.
To change a hotspots position. Just change the view and click on the Set position link.
In the expert mode you also have multiple options to choose from like pitch or yaw of a picture.
If you are satisfied with your results click on Done.